

How to use our mobile banking app
How to download the mobile banking app
How to find a HomeStreet Bank location
To download the mobile banking app:
Below are screenshots from an iPhone showing how to download the app, view your balance and account activity, deposit a check, and enable card controls. If you use an Android, it will look slightly different.
1. To use the HomeStreet Bank mobile app, you must first be in enrolled in Online Banking. If you aren't yet signed up for Online Banking, click here to enroll now. Please note that it may take 1 business day for your Online Banking enrollment to process before you are able to use the mobile banking app.
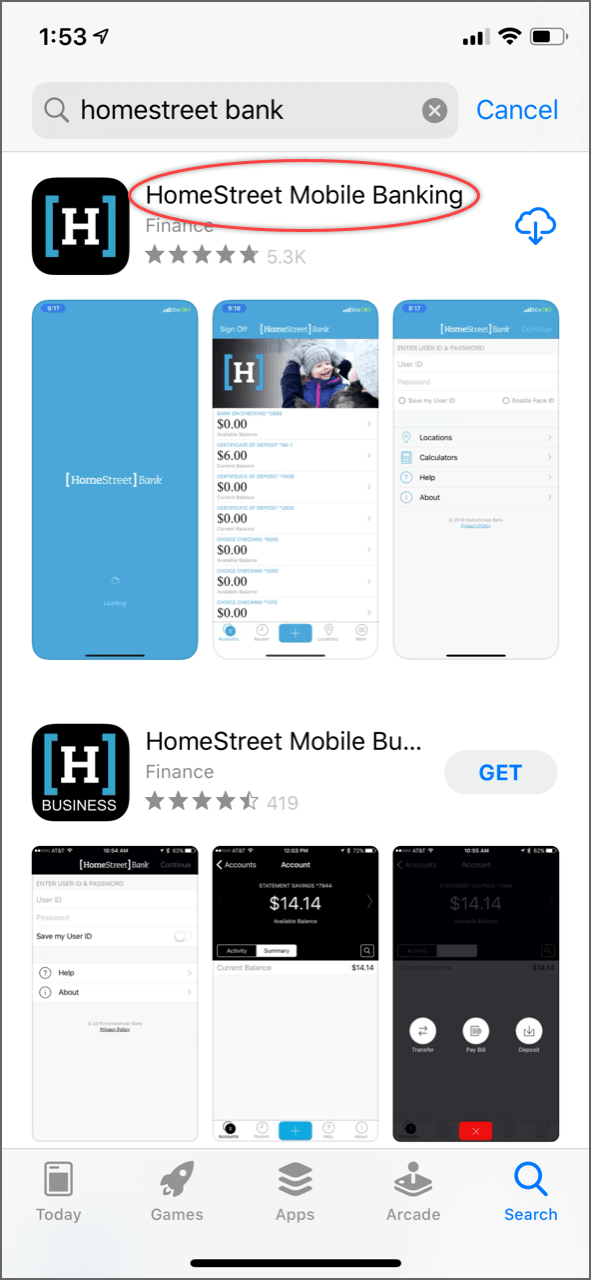
2. Go to the App Store and search for “HomeStreet Bank.” Download the “HomeStreet Mobile Banking” app.
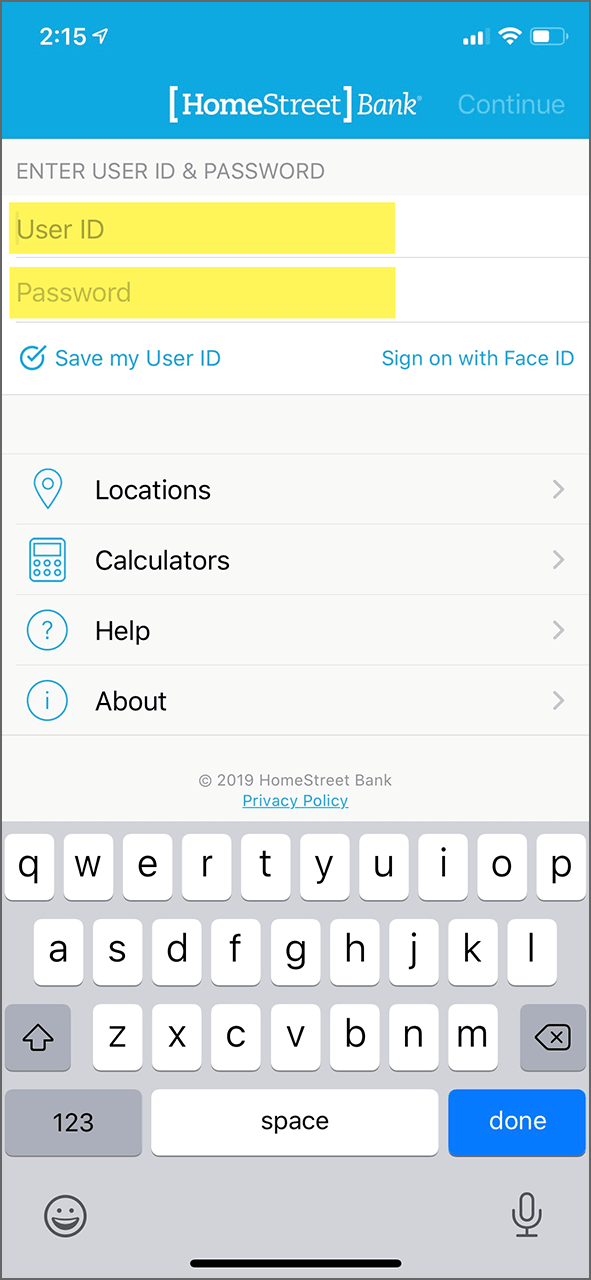
3. Log in, using your same User ID and Password as your Online Banking login.
Screenshot of HomeStreet mobile app login screen
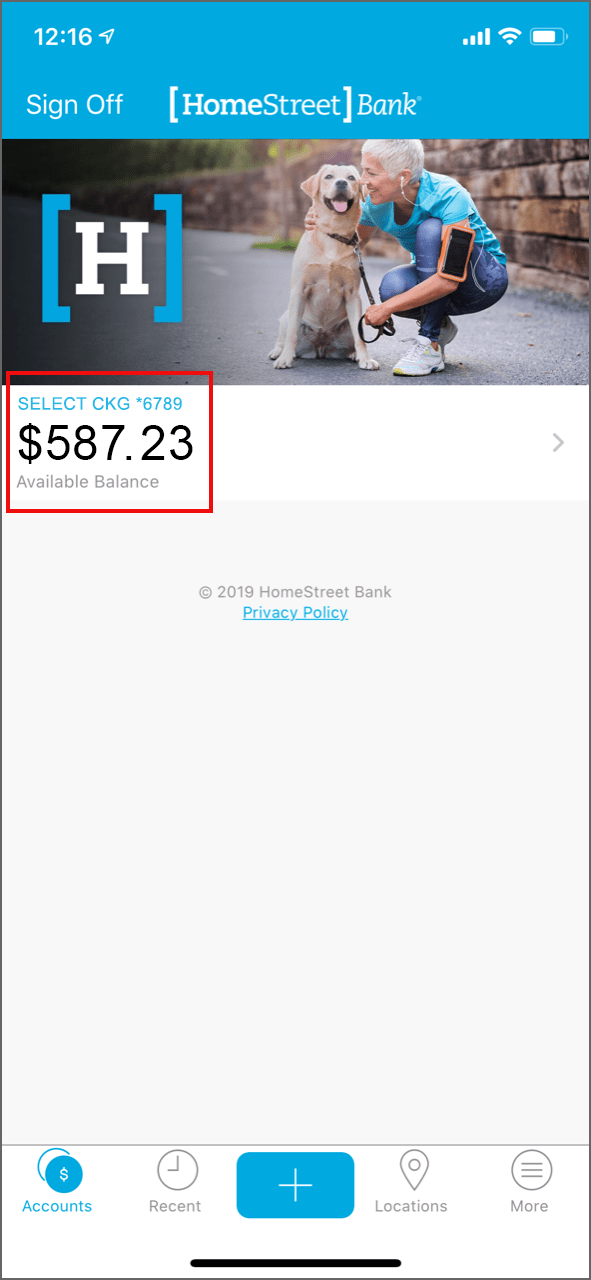
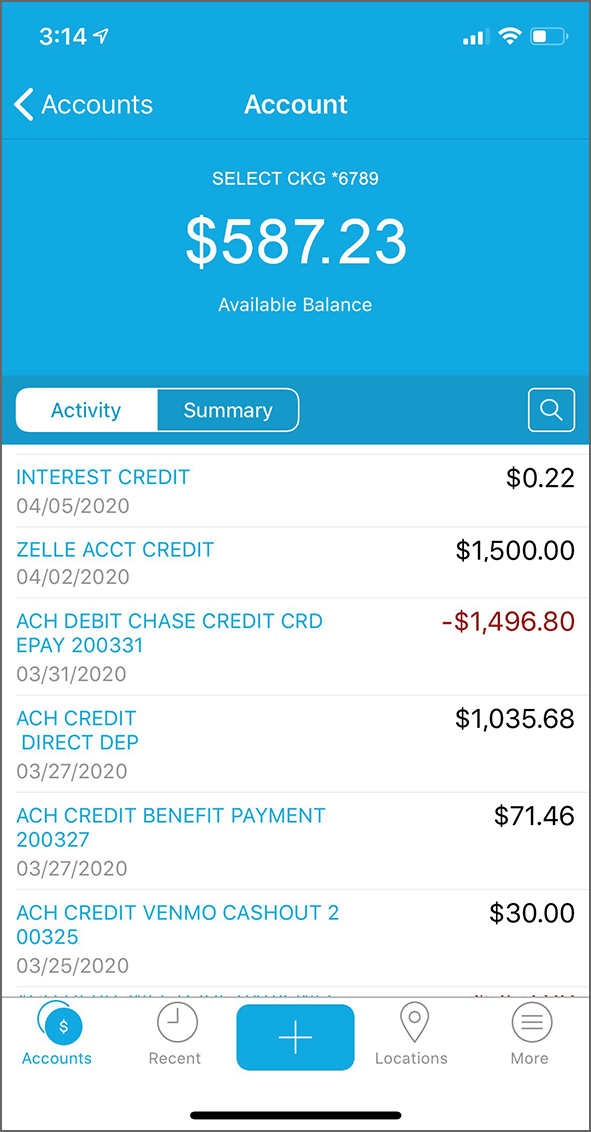
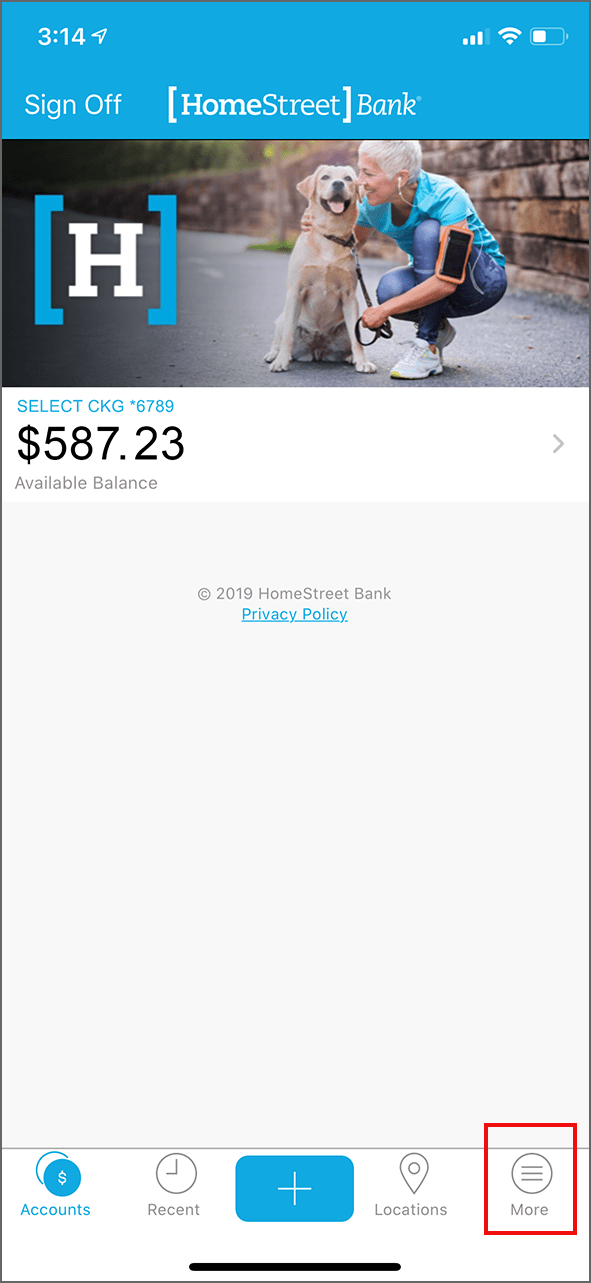
4. When you log in, you will see your balance. Tap the balance to see all recent activity.
Screenshot of HomeStreet mobile app - account balance
Screenshot of HomeStreet mobile app - account activity
To deposit a check:
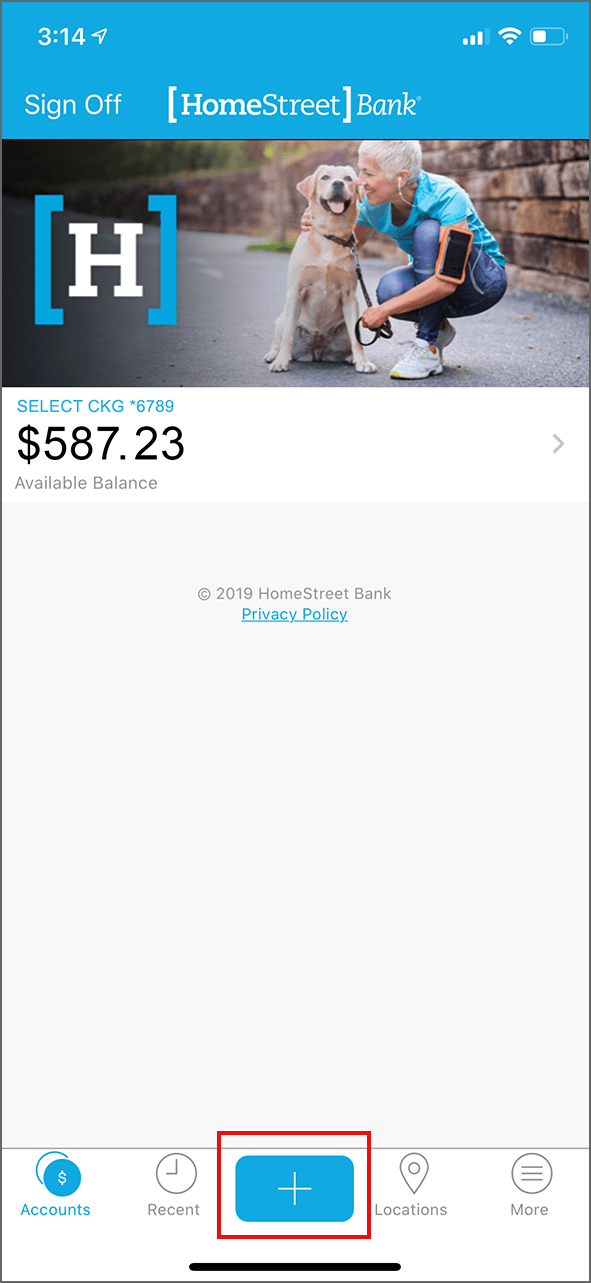
1. Tap the “+” on the bottom of the screen.
Screenshot of mobile app
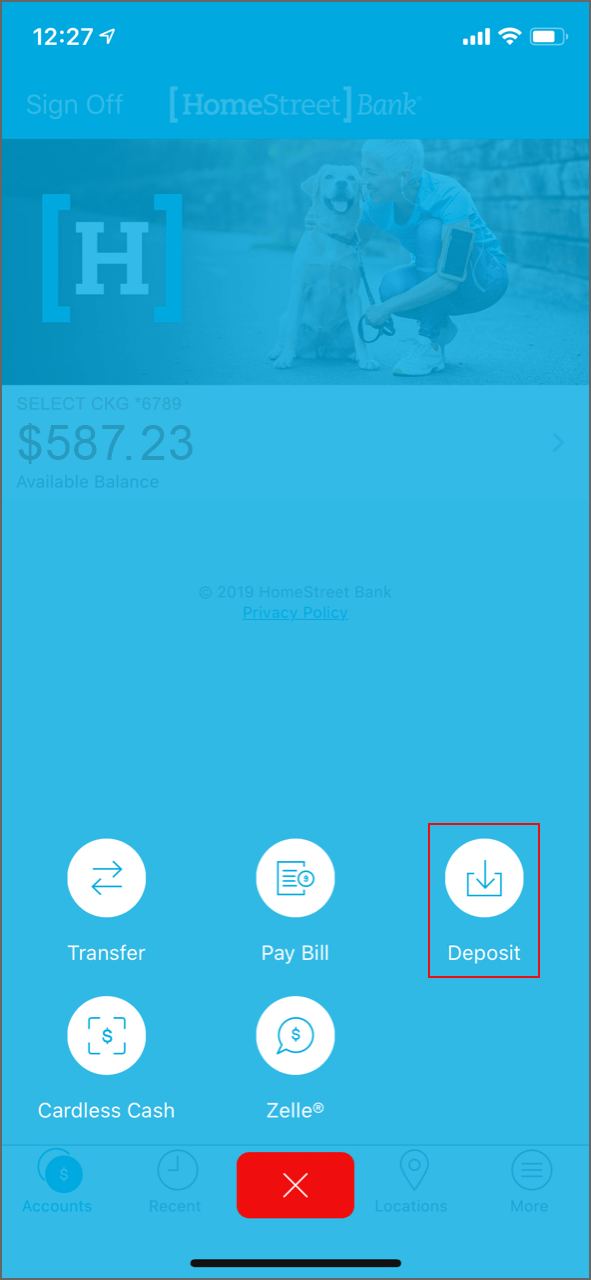
2. Tap “Deposit.”
Screenshot of tapping the “+” on the bottom of the screen and tap “Deposit.
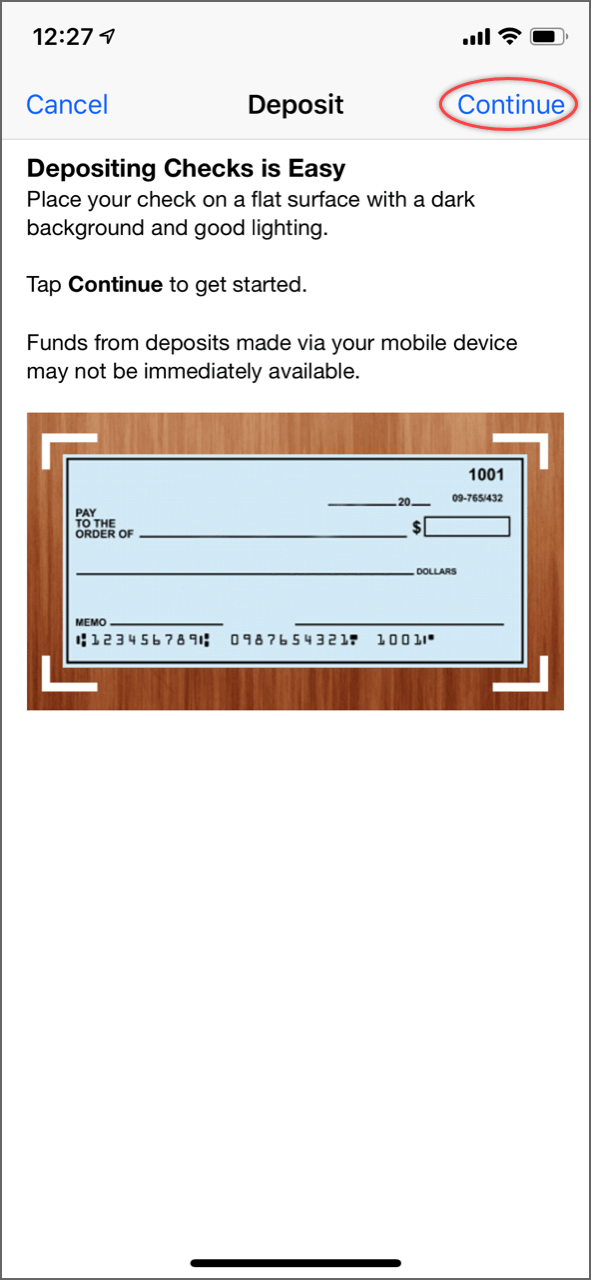
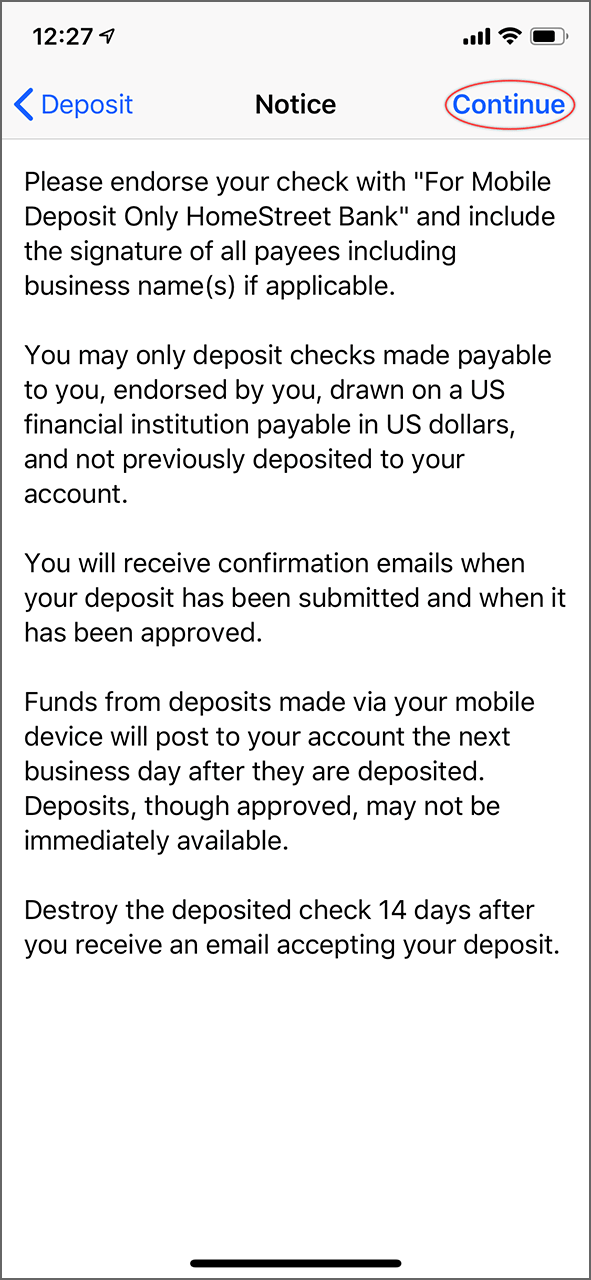
3. Read the instructions and tap "Continue."
Screenshot of instructions
Screenshot of instructions
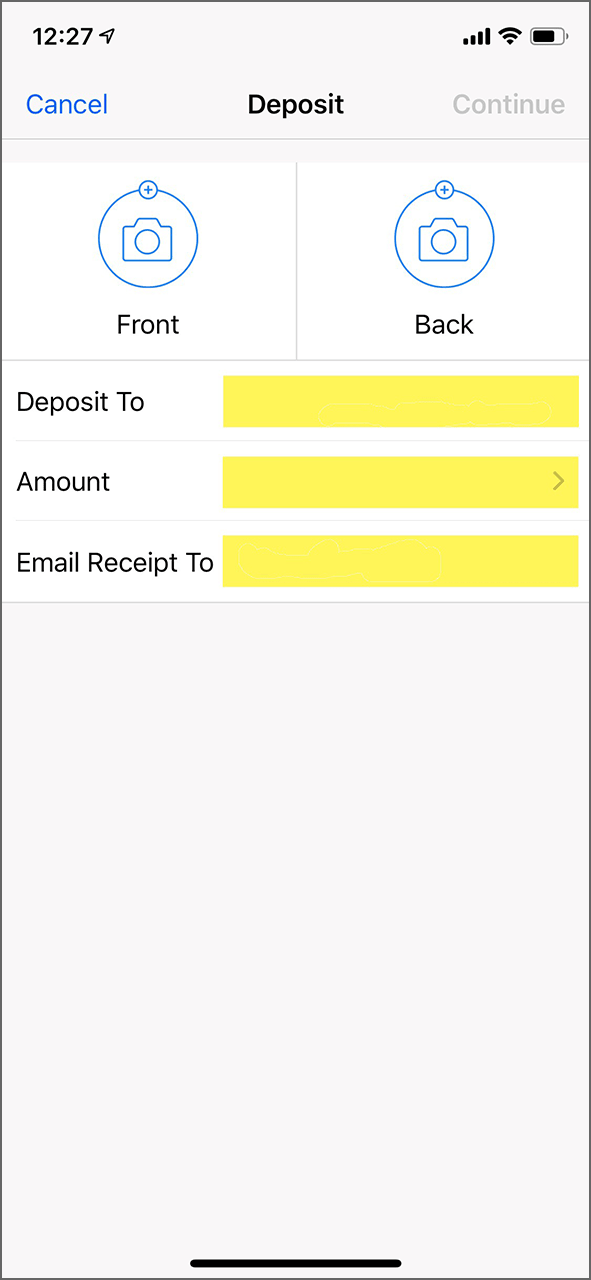
4. Take photo of front and back of check, enter the amount, and the email address where the receipt should be sent.
Then tap "Continue."
Screenshot of front and back of check on app
To find a HomeStreet Bank location:
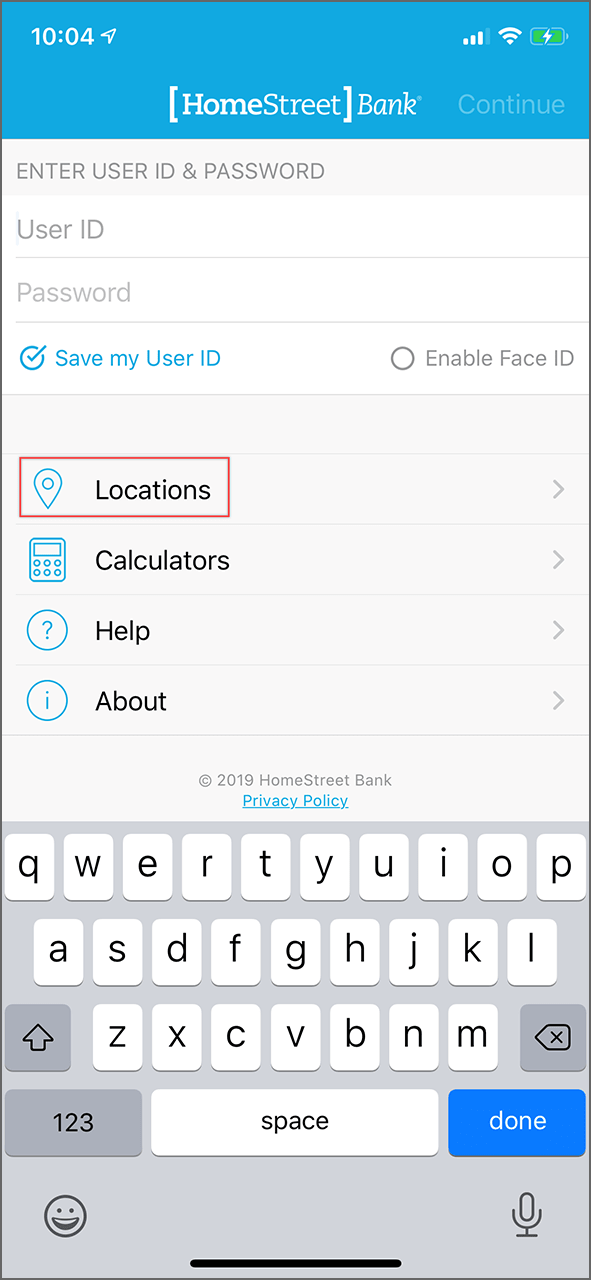
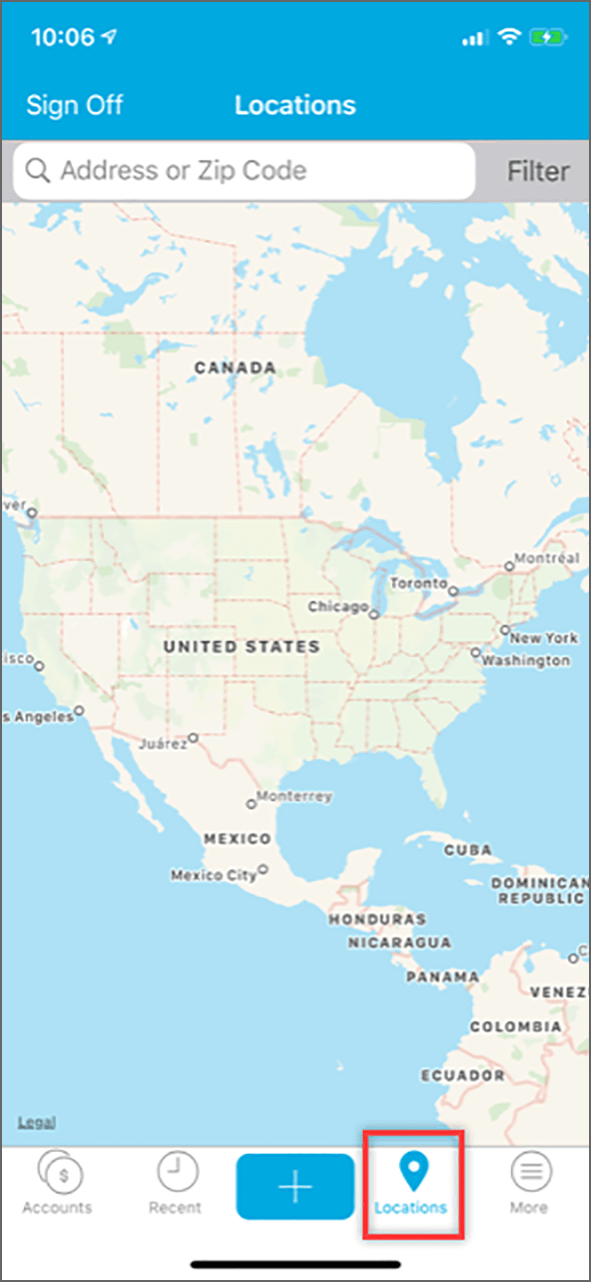
1. On the log-in screen, tap “Locations.” (You do not have to log in to the app to search for locations.)
Screenshot of Locations being selected in the app
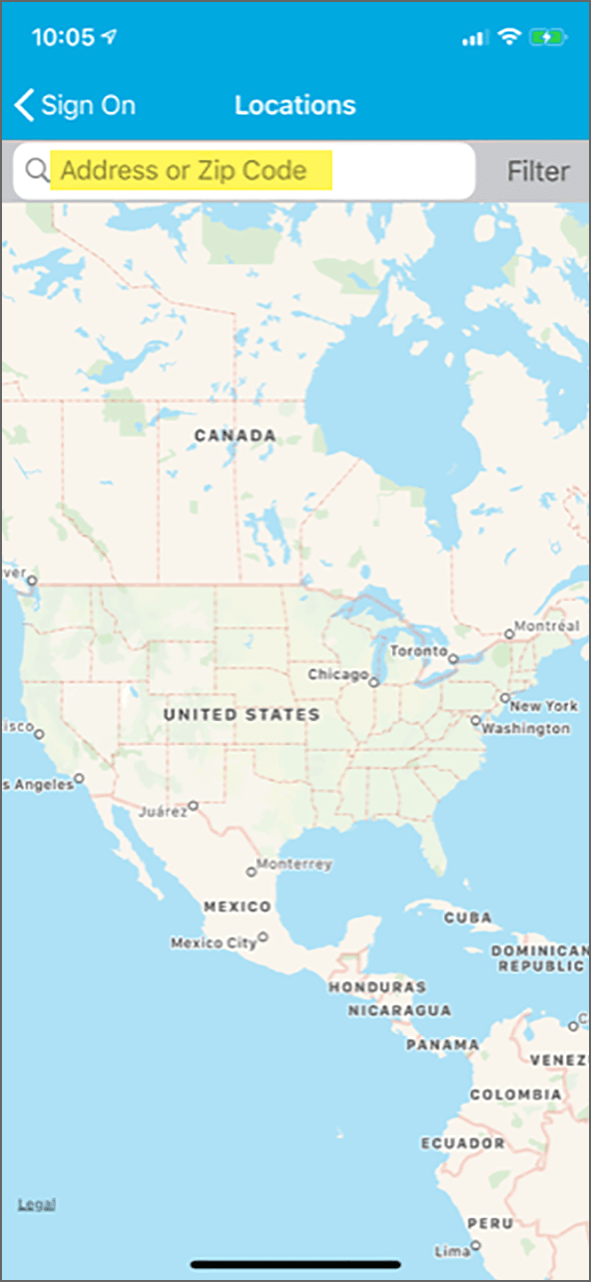
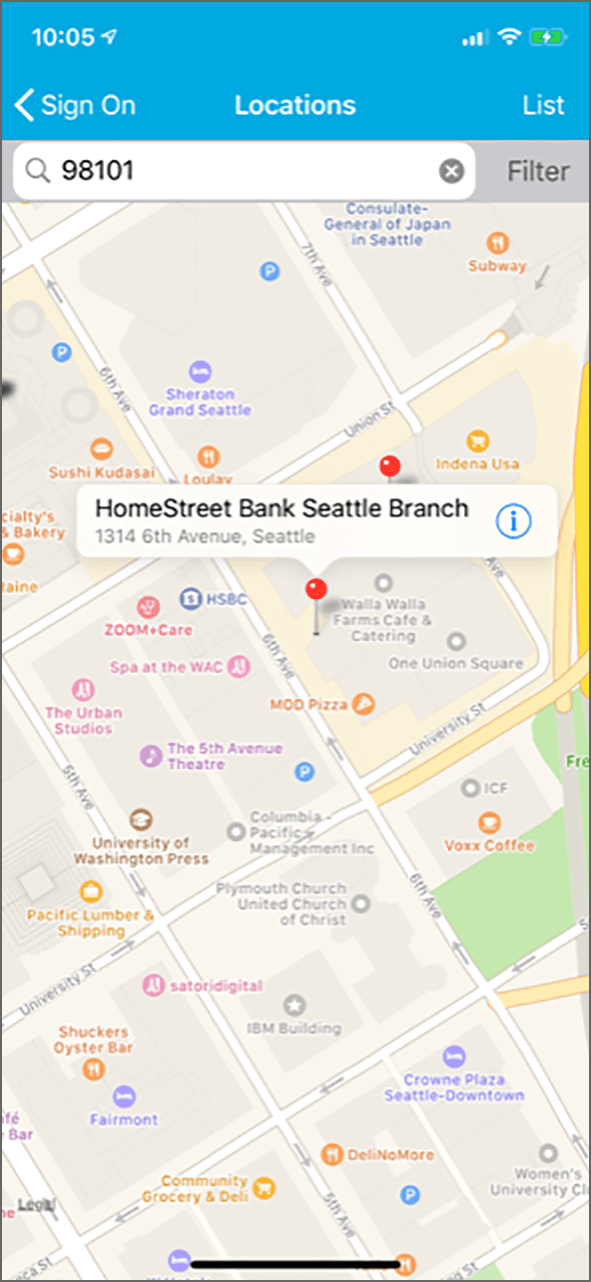
2. Enter the address, city, or zip code that you are looking for.
Screenshot of the app with address highlighted
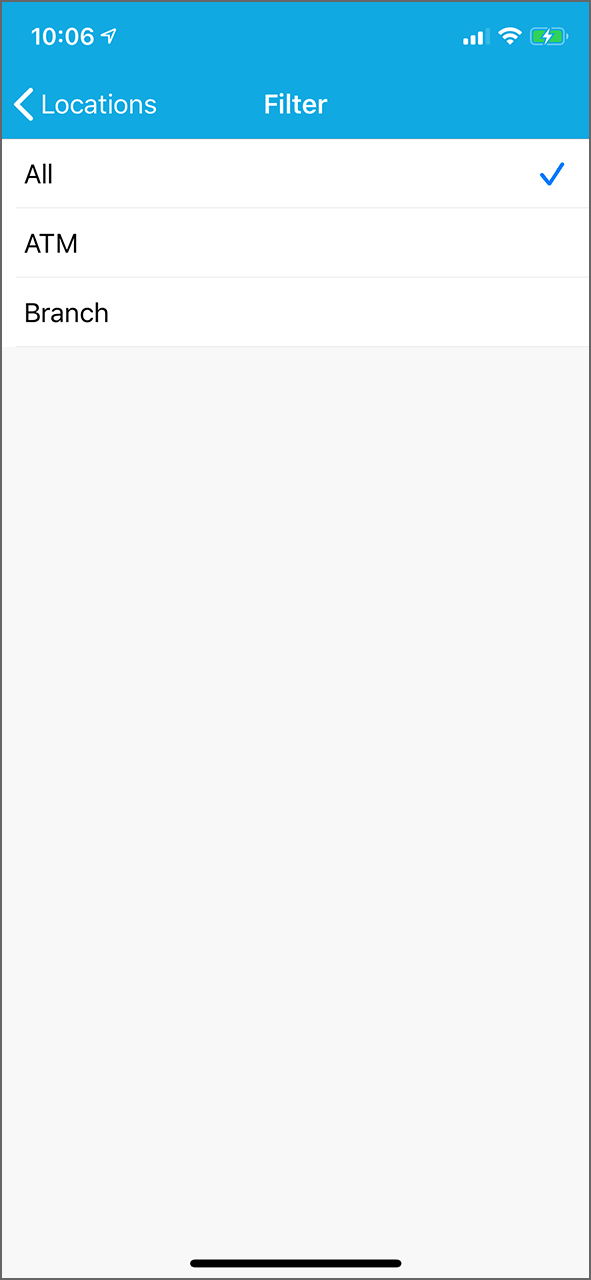
3. Tap “Filter” to reveal ALL locations, only Branch locations, or only ATMs. All 30,000+ ATMs in our MoneyPass ® network will show up in your search.
Screenshot of app with filters circled
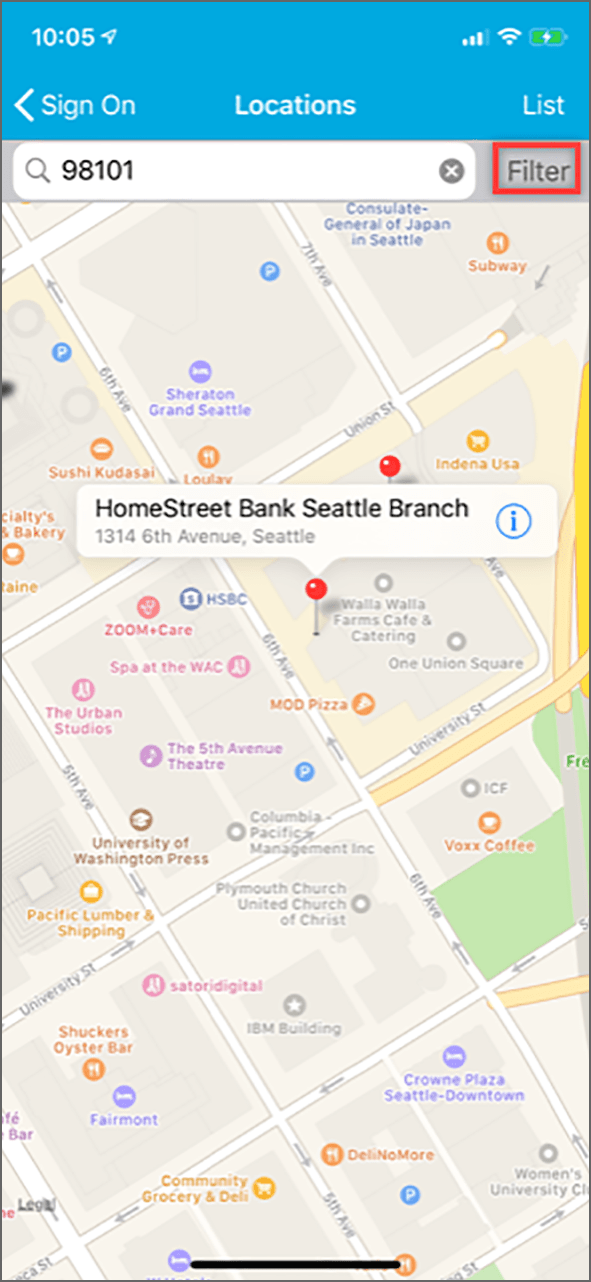
All is selected
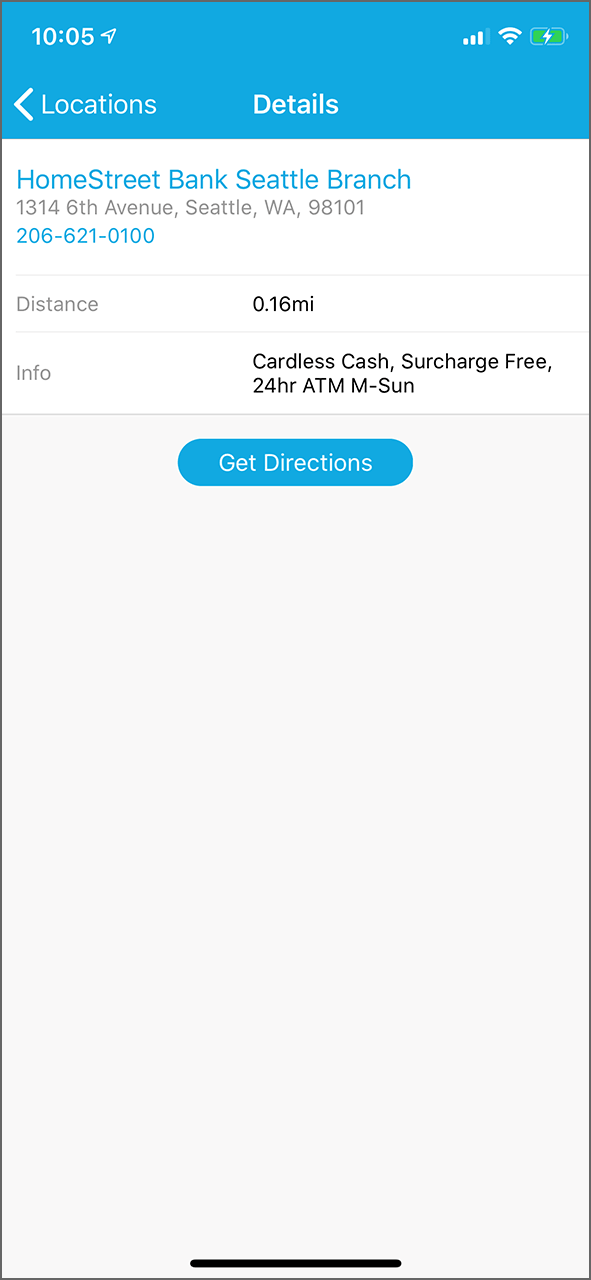
4. Tap the red pin in the map to reveal the location and then tap again for address, phone number, additional information, and to get directions to the location.
Screenshot of a map app with the red pin
Bank branch details and address
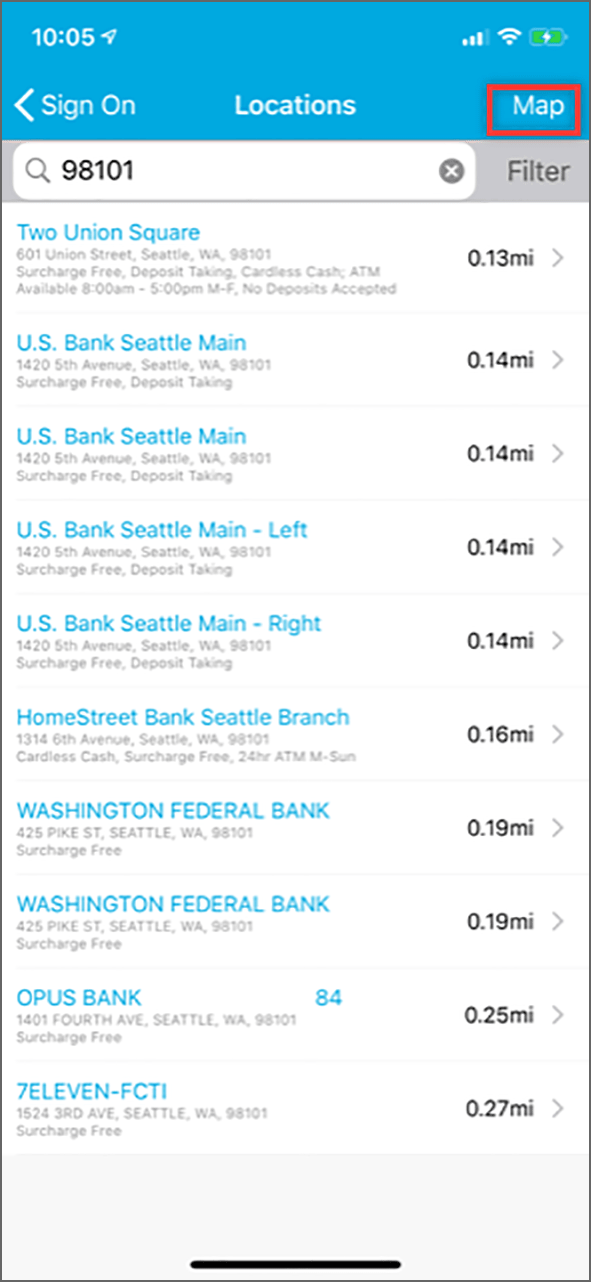
5. You can view the locations on the map or tap “List” to see the locations in a list format. Tap “Map” to bring it back to the map view.
List is highlighted
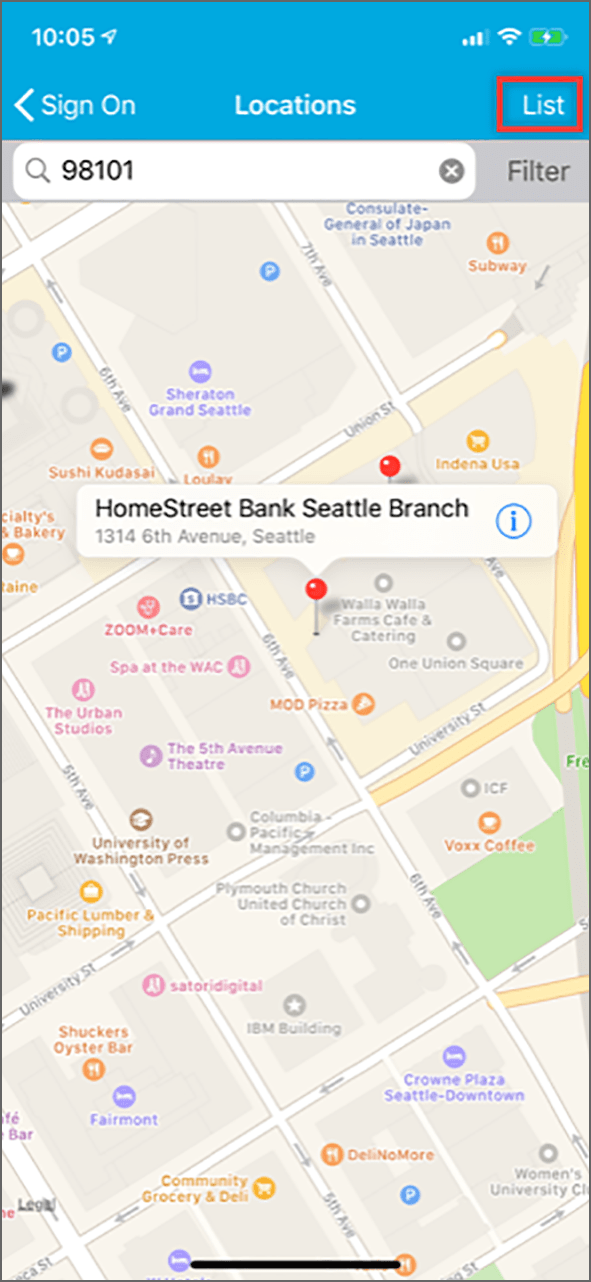
Screenshot of map with Map circled
6. You can also search for locations once logged in by tapping “Locations” on the bottom. It provides the same search functions as noted above.
Screenshot of Locations being highlighted in mobile app
To use Zelle:
To send money
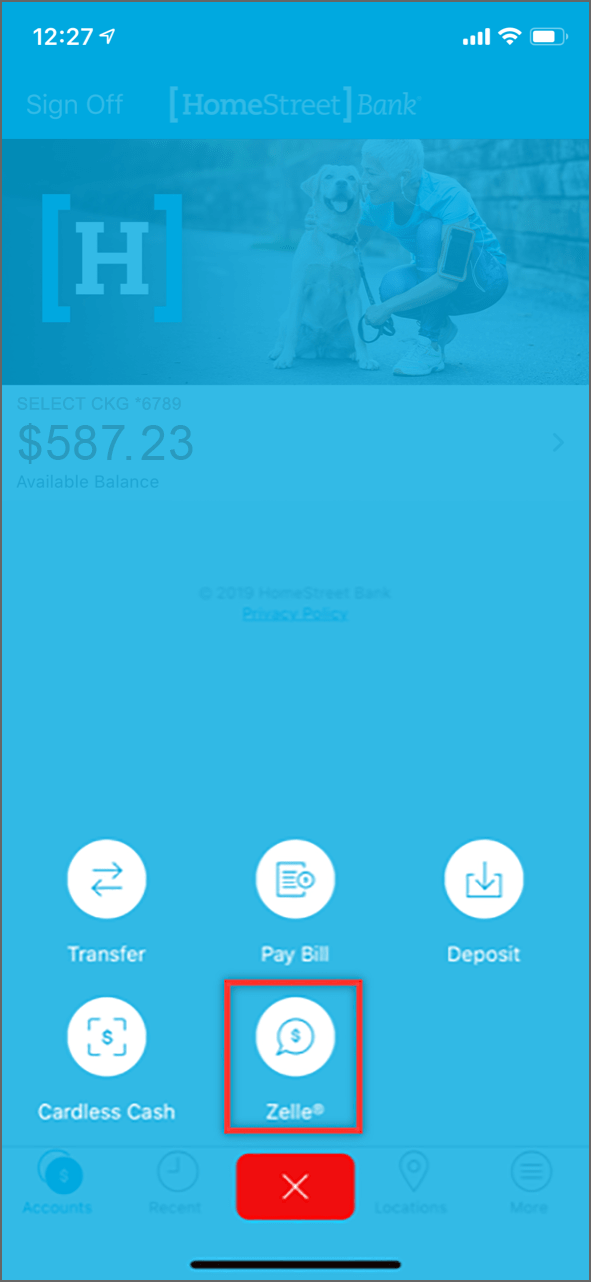
1. Tap the “+” on the bottom of the screen.
2. Tap "Zelle."
Zelle is highlighted
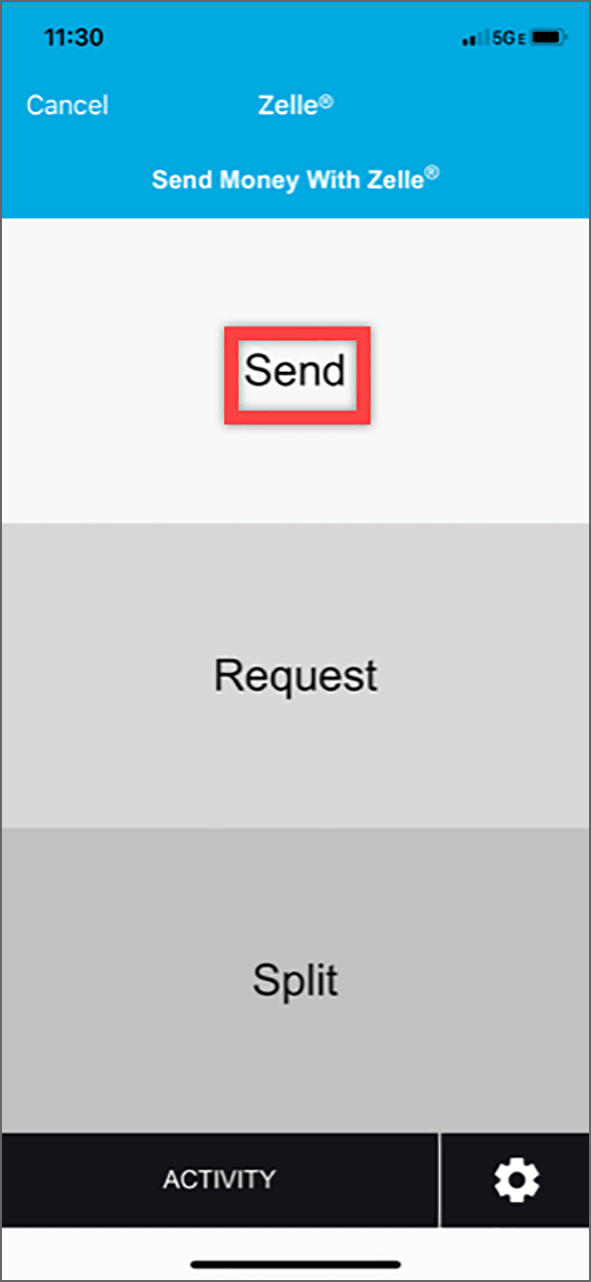
3. Tap "Send."
Send is highlighted
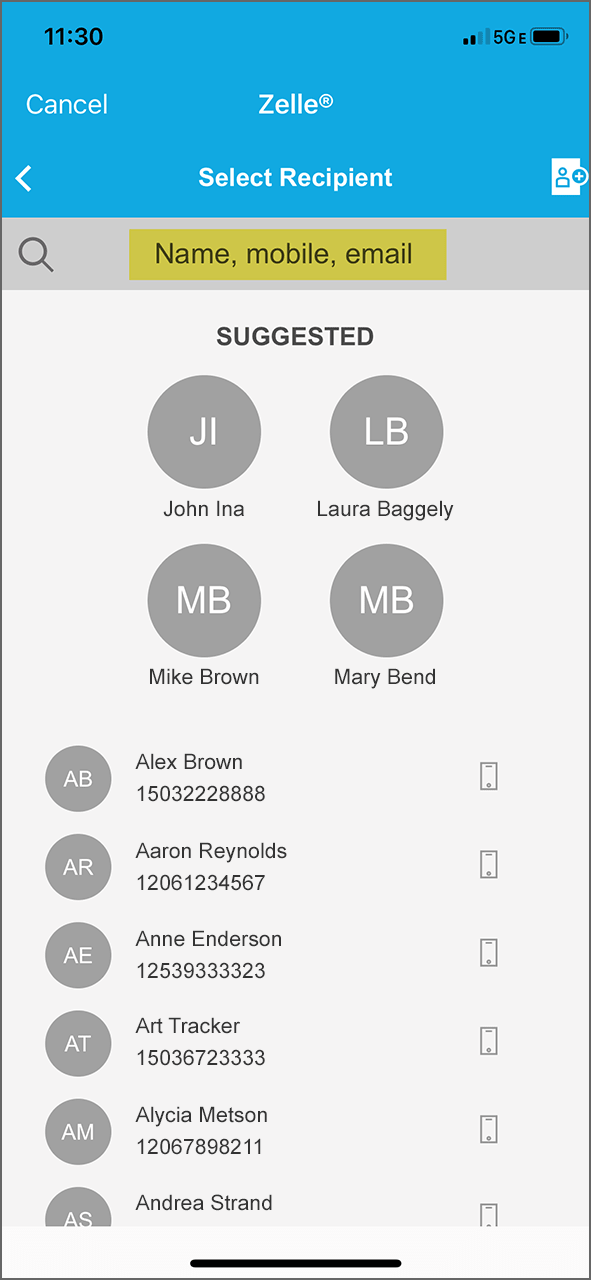
4. Type in a name, mobile phone number, or email. Or choose from the suggested options.
Name, Mobile, and Email are highlighted
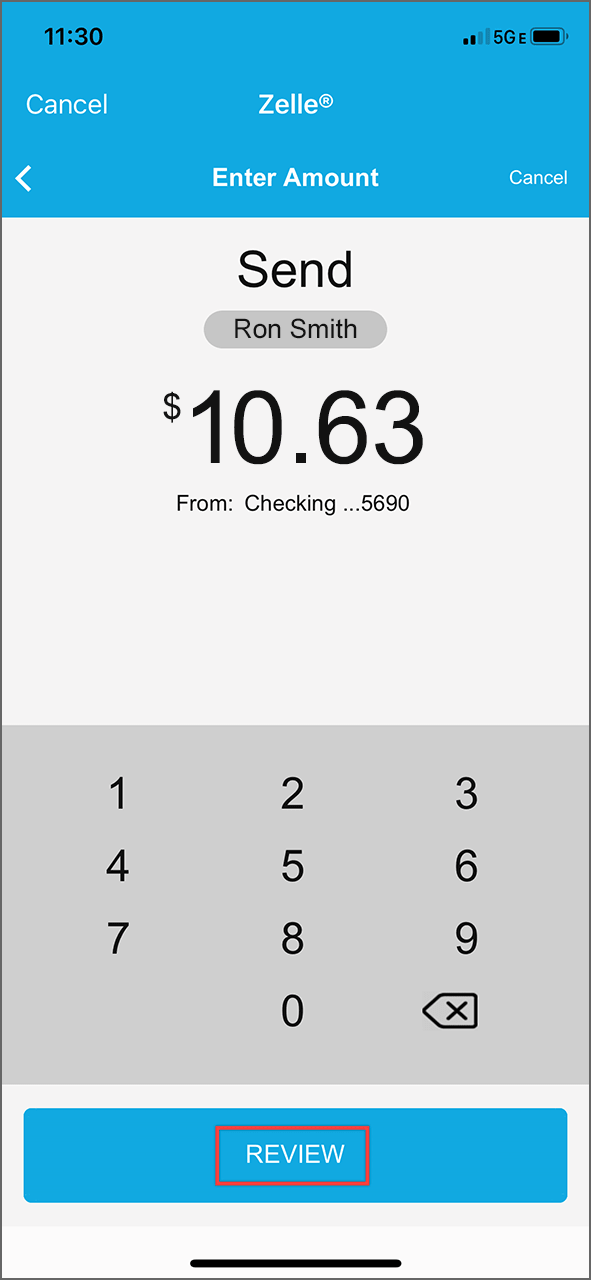
5. Type in the amount of money you want to send and tap “Review.”
Review is highlighted
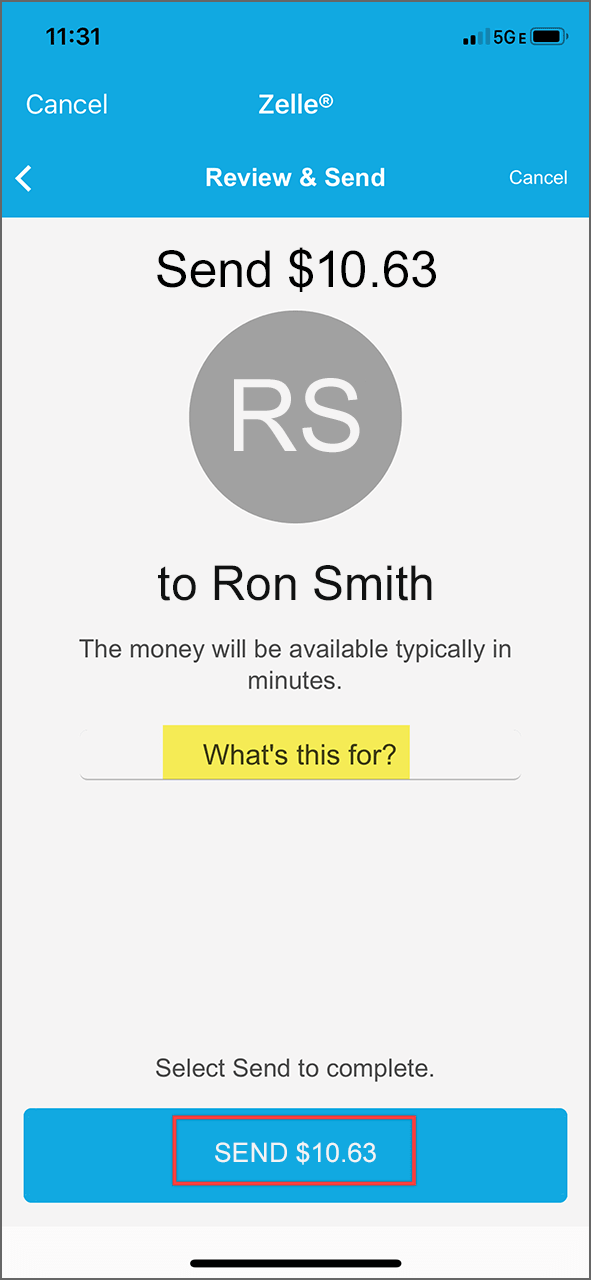
6. You can include a note describing what the money is for, or you can leave it blank. Then tap “Send.”
Note and Send areas are highlighted
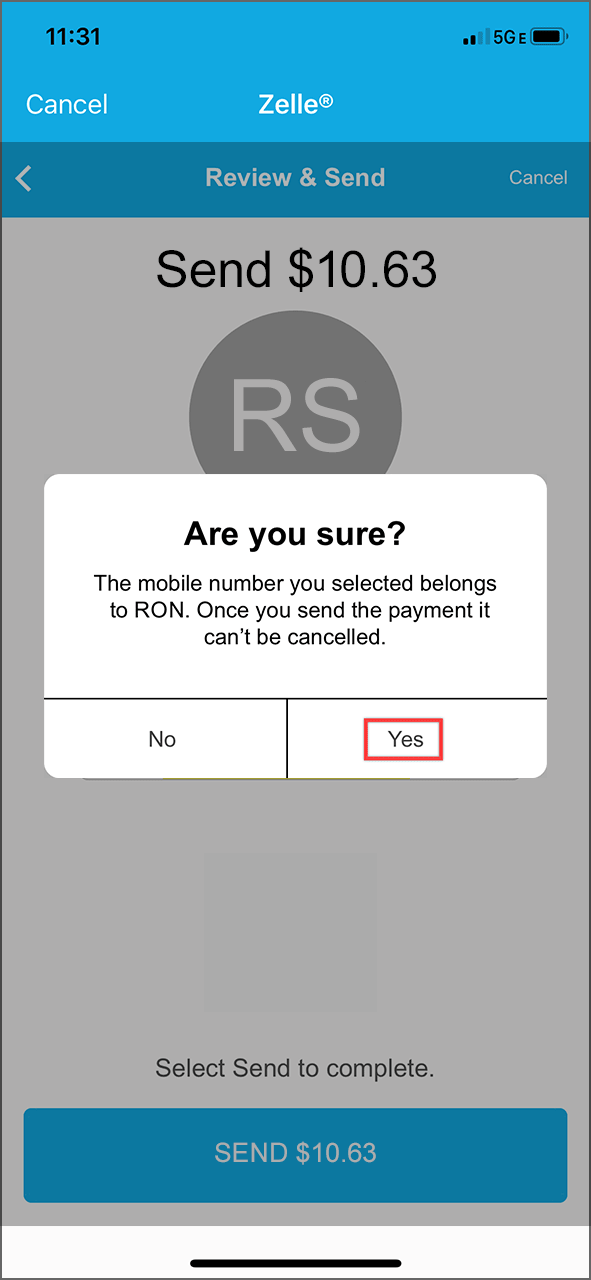
7. If everything looks correct, tap “Yes” when asked “Are you sure?”
Yes is highlighted in the prompt
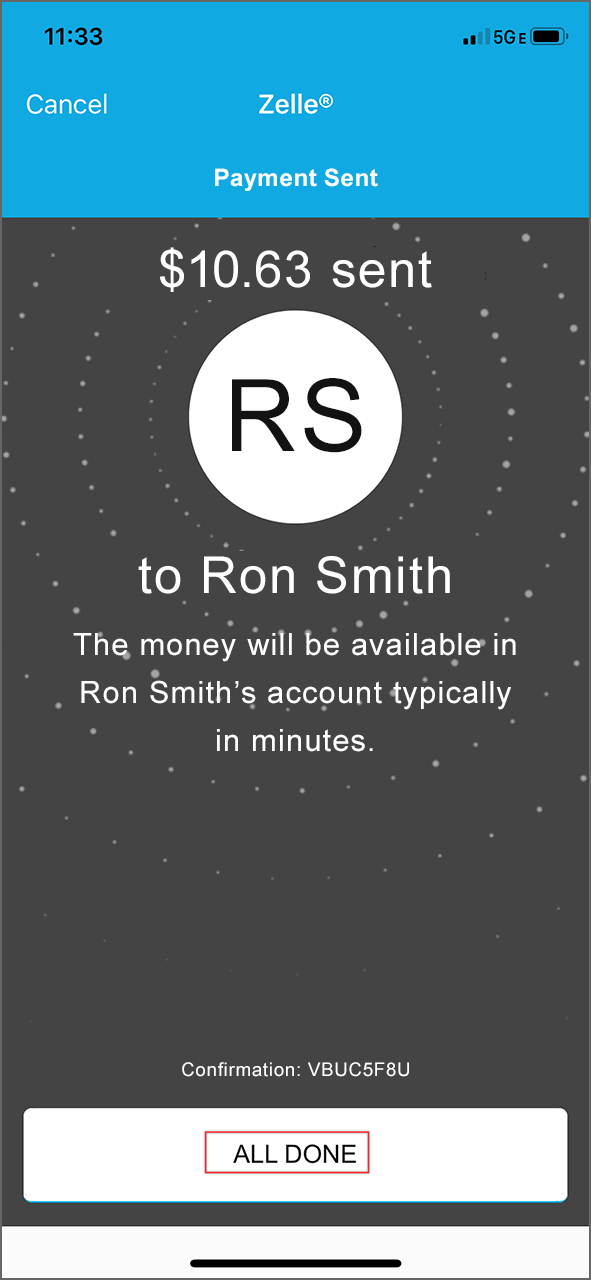
8. You will see a confirmation screen that your money has been sent. Tap “All done” to go back to the main menu.
All done is highlighted
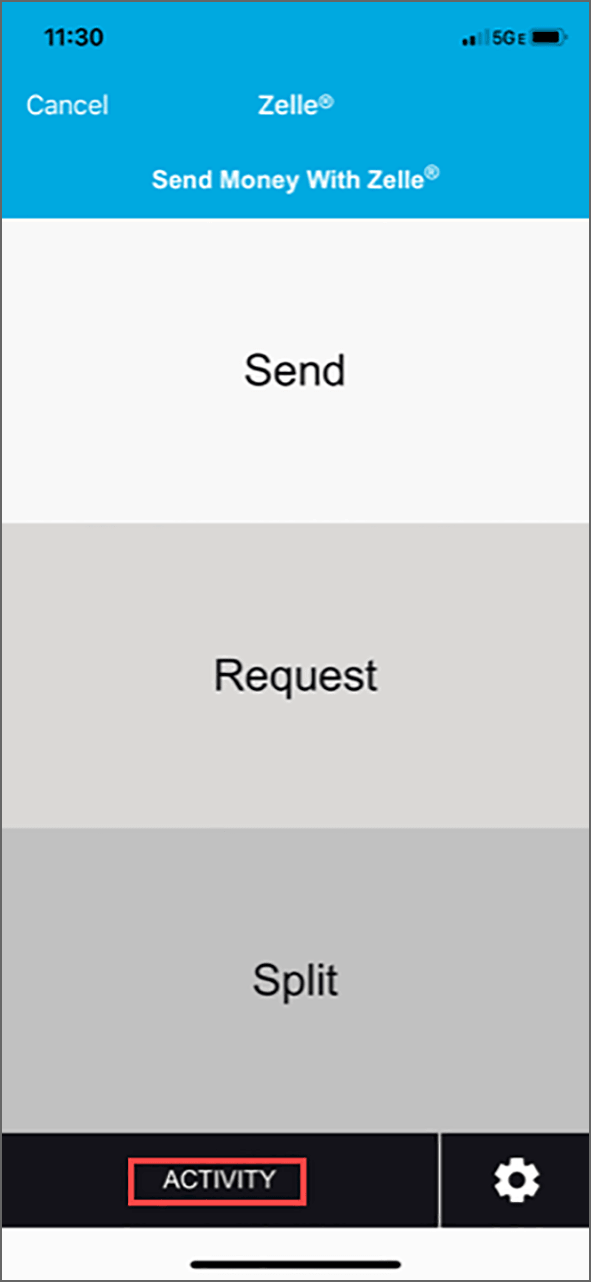
9. On the main menu, if you click “Activity” you can see all pending and past transactions.
Activity is highlighted
To request money
1. Tap the “+” on the bottom of the screen.
2. Tap “Zelle.”
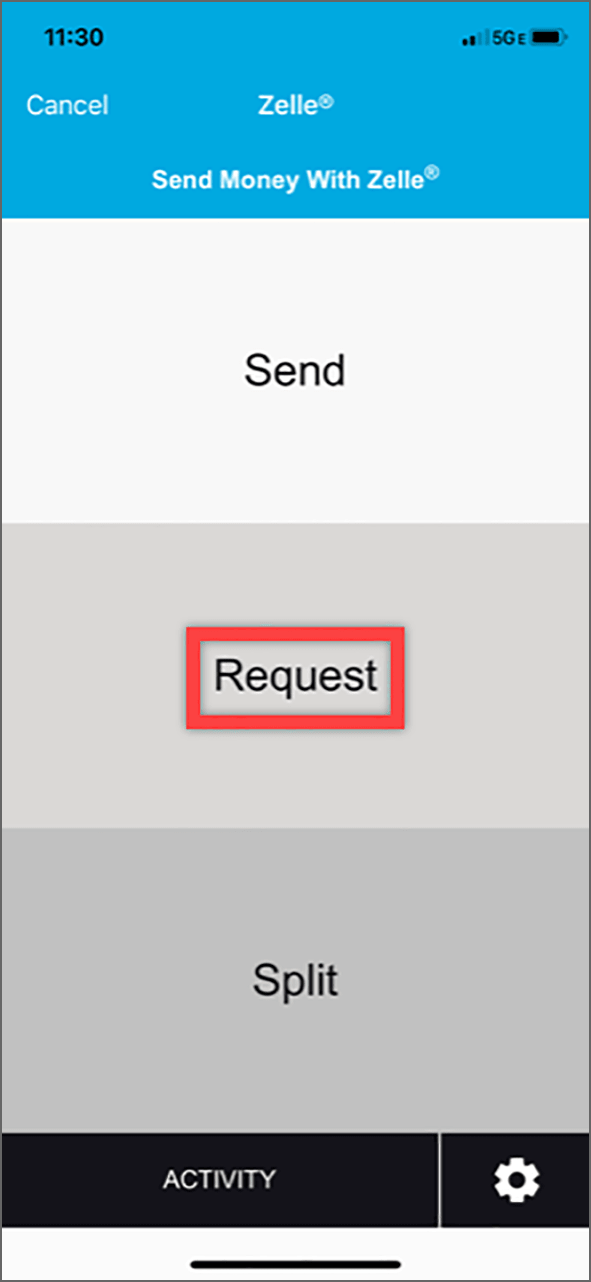
3. Tap “Request.”
Request button is highlighted
4. Type in a name, mobile phone number, or email. Or choose from the suggested options.
Name, Mobile, and Email are highlighted
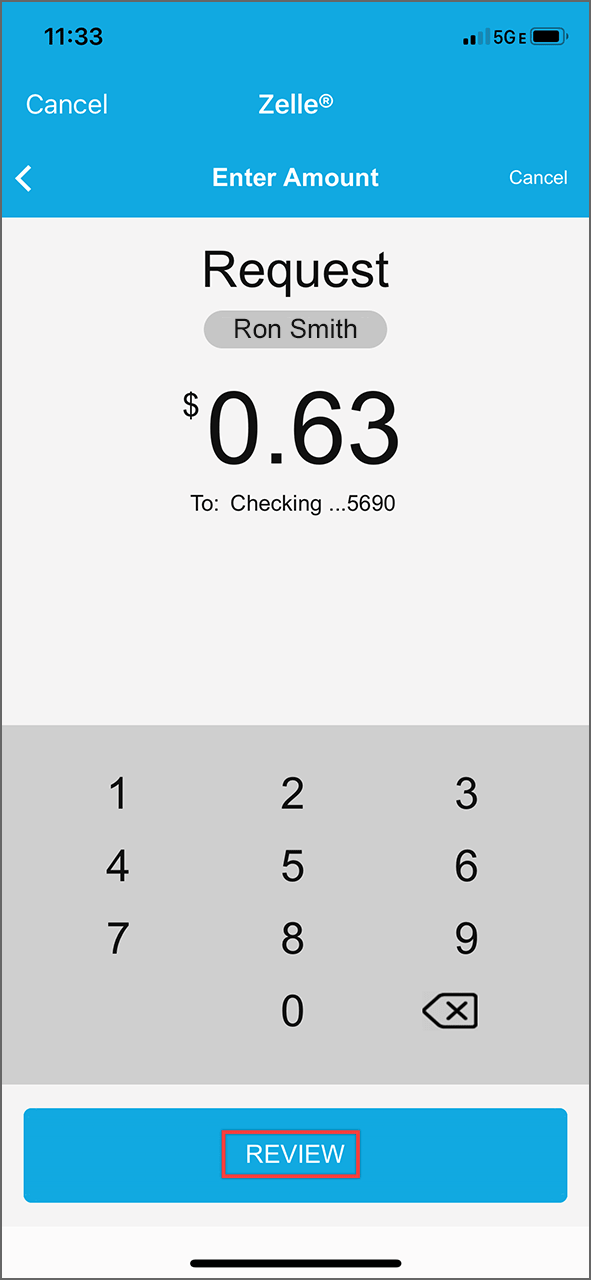
5. Type in the amount of money you want to request and tap “Review.”
Review is highlighted
6. You can include a note describing what the money is for, or you can leave it blank. Then tap “Request.”
Request is highlighted and Pizza in
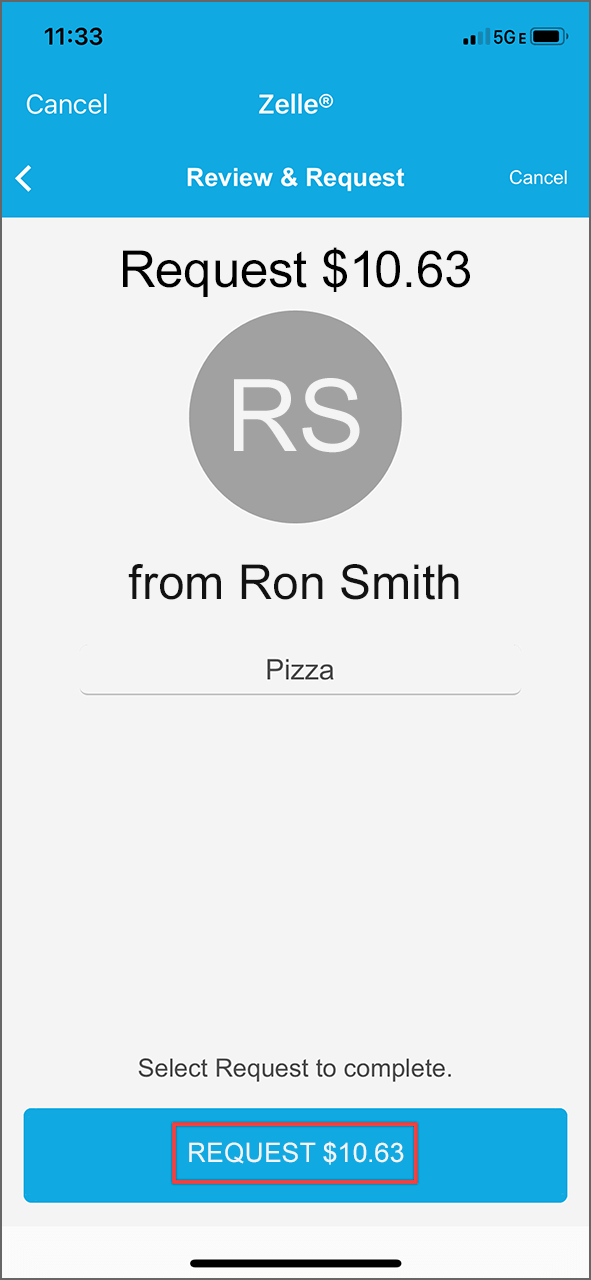
7. You will see a confirmation screen that your request has been sent. Tap “All done” to go back to the main menu.
4-min

To use Card Controls:
1. Tap "More" on the bottom of the screen.
Screenshot of mobile app
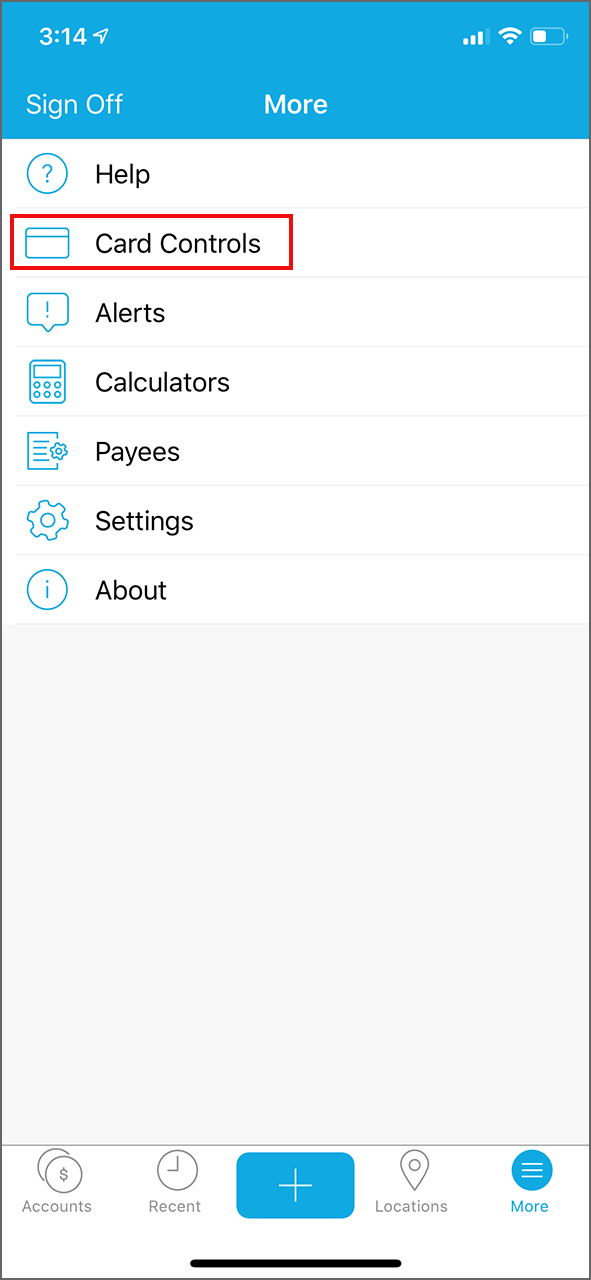
2. Then tap "Card Controls."
Screenshot of mobile app
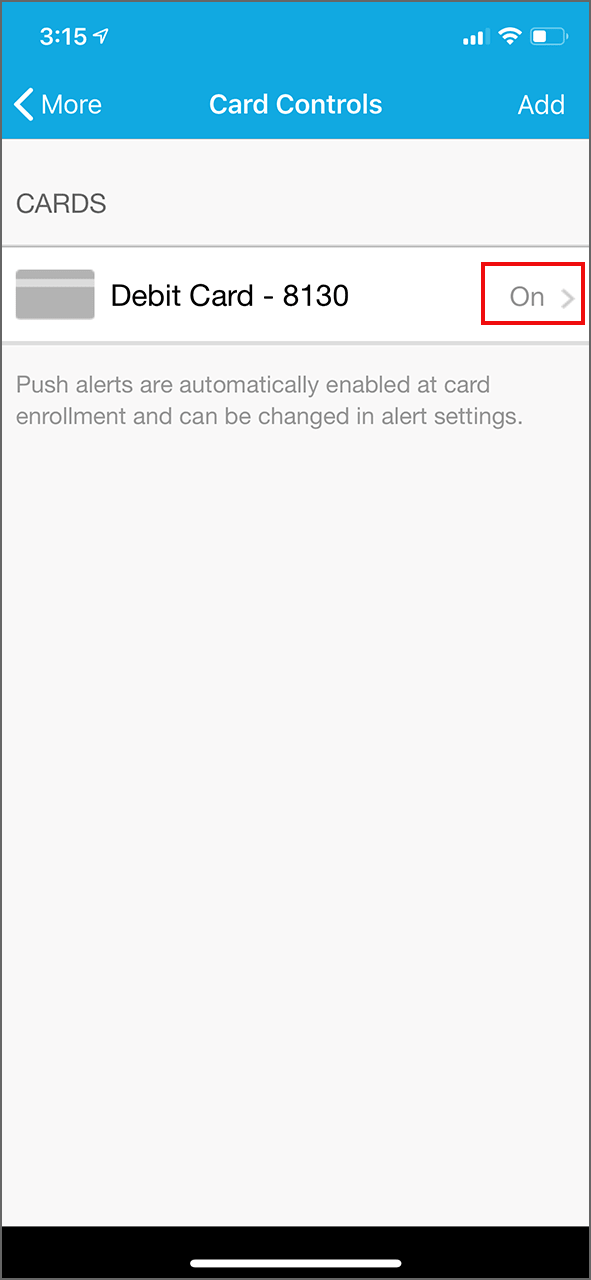
3. Register your card or tap the card you want to control and toggle the button to turn on or off. If you turn your card off, all transactions except for recurring payments will be denied until you re-enable the card.
Screenshot of registering card
4. From the main Card Controls screen, you can control the geographic region where you card will work, types of transactions, types of merchants, and the threshold amount.
Screenshot of enabling card for use
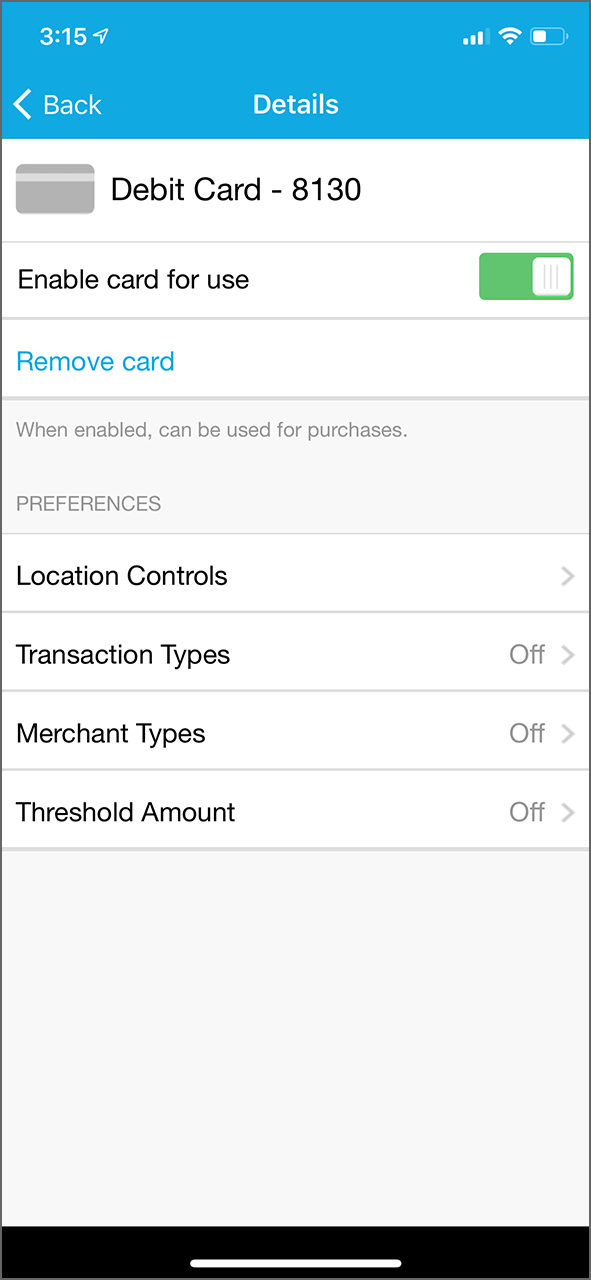
Card Control preferences include:
- Enable/disable your card - instantly disable your debit card if it’s been misplaced or stolen. Once you find it, enable it again just as easily
- Geographic location - define custom geographic regions based on where your card can be used.
- Types of merchants - select the merchant categories you want to be able to use, such as groceries, gas stations, entertainment, or travel.
- Types of transactions - disable eCommerce if you’re trying to kick your online shopping habit. Or enable it again to make a purchase.
- Spending limits - trying to maintain a budget? Set your maximum amount allowed.
- Alerts - decide which information you’d like to receive via push notifications – every time you make a transaction, when your card has been denied, and more.